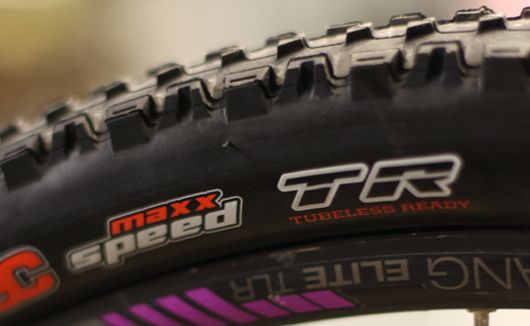
If off-road riding is your thing, you’re likely aware of the tubeless trend. Companies like Stan's NoTubes have advertisements in nearly every mountain bike magazine, many tire and rim manufacturers boast tubeless ready capability and nearly all higher-end mountain bikes come standard with tubeless compatible wheelsets installed.
The Benefits of Going Tubeless
What are the Benefits of Tubeless Tires?
So, what’s tubeless all about? Why make the conversion? Here are a just a few considerations:
1. Tubeless mountain bike tires provide better traction
With tubeless MTB tires, expect a smoother ride and the ability to maintain traction in rough terrain. The goal in biking is to keep the tire on the ground as much as possible - not bouncing off objects. While suspension does the majority of the work in absorbing impact and keeping the tires on the ground, tire pressure is the second most important factor.
In a tubeless mountain bike system, the ability to run a lower tire pressure means you can maintain more ground contact and the tire can wrap around objects. As an example, a 175lb rider running a 2.2” 29er tire can safely ride PSI in the mid-20s without a fear of losing control or lowering speed around tree roots and rocks. Running a tube in the same setup, the rider might have to ride a tire pressure as high as 35 PSI.
With the lower pressure, technical climbing also becomes more enjoyable, mainly because the tread of the tire grips obstacles and the impact is better absorbed and displaced. In this instance, with the tire firmly on the object, you get more of the power you’re putting into the climb directly into the tire,
This means that you will find it easier to maintain traction, momentum and form. Of course, running too low of tire pressure can lead to rim damage, but a bit of common sense should prevail here. With minute adjustments of tire pressure based on trail conditions, this will likely become a moot issue.
2. Reduce weight from tires
An average 29er tube weighs-in at around 200 grams. Latex filled self-sealing tubes (designed to mimic tubeless setups) can weigh upwards of 400 grams each. In a typical tubeless setup, you’re looking at about 125 grams of sealant in each tire, meaning the overall weight savings can be anywhere from 150 - 650 grams by ditching the tube.
The reason you want to shave weight in the rims and tires - as opposed to, say, cutting weight out of a frame or seat post - has to do with the effect of rotational mass. It simply takes more energy to accelerate a heavier wheel. And, because you brake and accelerate frequently when mountain biking, the overall effect is that you’re going to expend greater energy accelerating and, generally, be slower over the long haul.
Overall, the weight savings may seem minimal - maybe 400 grams in total - but when you’re powering up tough technical sections or trudging through climb after climb, you’ll be certain to notice the difference.
3. Eliminate Pinch Flats
We’ve all been there: barreling through a root strewn downhill or landing a large drop and just when you think you’ve made it...hissssssss. The tire folds. The ride comes to a stop. It’s a pinch flat, a snake bite - a point where, because of the impact, the tube has pinched between the rim and the tire, causing the distinct two-hole catastrophic tears in the tube. Good luck patching these suckers with a standard patch kit; you’ll likely need an extra tube with you to resolve the issue. If you race, you know those minutes spent fixing the issue will be the the difference between a podium finish and a potential DNF.
With a tubeless setup, pinch flats are much less likely. Big impacts or running too low of tire pressure can certainly lead to “burps” where the pressure pushes past the rim and tire walls, but if the tire hasn’t unseated itself from the rim (hard to do) the issue is easily resolved by simply adding more air from a pump or CO2. In a matter of seconds you’re on your way.
4. Eliminate the Need for a Patch Kit
Around Texas, we have the notorious Puncturevine plant (produces those needle sharp goatheads), mesquite thorns, and a wide variety of spine producing cactus that easily pierce tires and make pin prick size holes through the tire and into the tubes. It may be 30 minutes into the ride before you notice it, but the tire inevitably gets flat, the ride stops, and the tire levers and the patch kit comes out. Minor tube punctures eat up ride time while you search for the puncture and there is no guarantee that the patch will hold.
The effect of minor punctures with tubeless: none. The various latex formulas that coat the inside of the tubeless tire setup means a small puncture - some up to a whopping 3mm or ⅛” - will self-seal. The pressure of the tire forces the sealant into the affected area and, within seconds, seals the area. If this fails (which it sometimes will if the foreign object is still lodged in the tire), the general practice is to simply remove the object, fill the tire with air and spin the tire to ensure a distribution of the sealant into the puncture. No dismounting of the wheel, taking off the tire needed.
This isn’t to say that tubeless systems don’t sometimes fail. You encounter a massive object and bend the rim causing the tire to not seat properly on it. You rip the sidewall of the tire on an object or sustain a large puncture. These impacts, however, would likely still cause your regular tube-filled tire to fail. But the beauty of the tubeless system is that you can do your best to fix the quick tear (perhaps using tape or even a dollar bill) still put in a tube in and ride away.
Deflating Some Myths
In the early days of tubeless technology, a lack of reliability in tubeless systems - and overall weight of the sealant and tires - were definite concerns. But the technology has come a long way in 10 years. There will always be people who ardently defend tubes and say that tubeless is a gimmick or not worth it. But in most every instance of mountain and trail riding, tubeless is - by far - the lightest, most reliable and cost effective setup you can ride.
Like any system, tubeless needs maintenance. In hot dry conditions, the sealant can dry up, requiring riders to add a small dose of new sealant to keep the system working. It can be as easy to do by simply removing the valve core, adding in sealant and re-inflating, but if the sealant dries up, you have to remove the valve core, address clumping and start over. If you don't ride often, be sure to be aware of the need to maintain and add small doses of additional sealant. In general, just try not let it dry out by keeping your bike indoors and out of super hot and dry conditions. This can be anywhere from 6-8 weeks depending on conditions. But, if you ride a lot, this could also be about the time you need to begin thinking about changing out tires due to normal wear and tear.
In general, we hope we’ve given you a better understanding of the benefits of the tubeless system. Whether you are considering tubeless tires for a new mountain bike or wanting to convert your existing ride, Mellow Johnny's staff can help.
Visit our Austin service center, call or send us a note to talk more. We know you'll soon wonder why you waited so long.
SHARE THIS POST